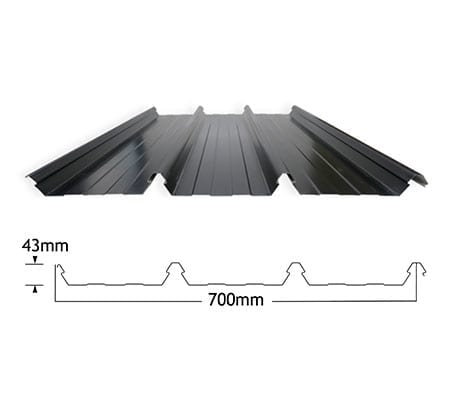
QUIKLOK 700 With High Ribs In QLD

Quiklok 700 benefits from a strong, clean finish without any visible fixings utilising a revolutionary concealed clip. It is ideal for long length roofing in both domestic and commercial applications, due to its allowance for thermal expansion and contraction.

The unique design of Quiklok 700 including the high ribs and deep pans mean that it is suitable for areas with high rainfall whilst allowing for a roof pitch as low as 1°. This decking system allows for an unrivalled wind load performance and uniform bird proofing. Quiklok 700 is available in a huge range of Colorbond® colours as well as Zincalume®.

Available Colours
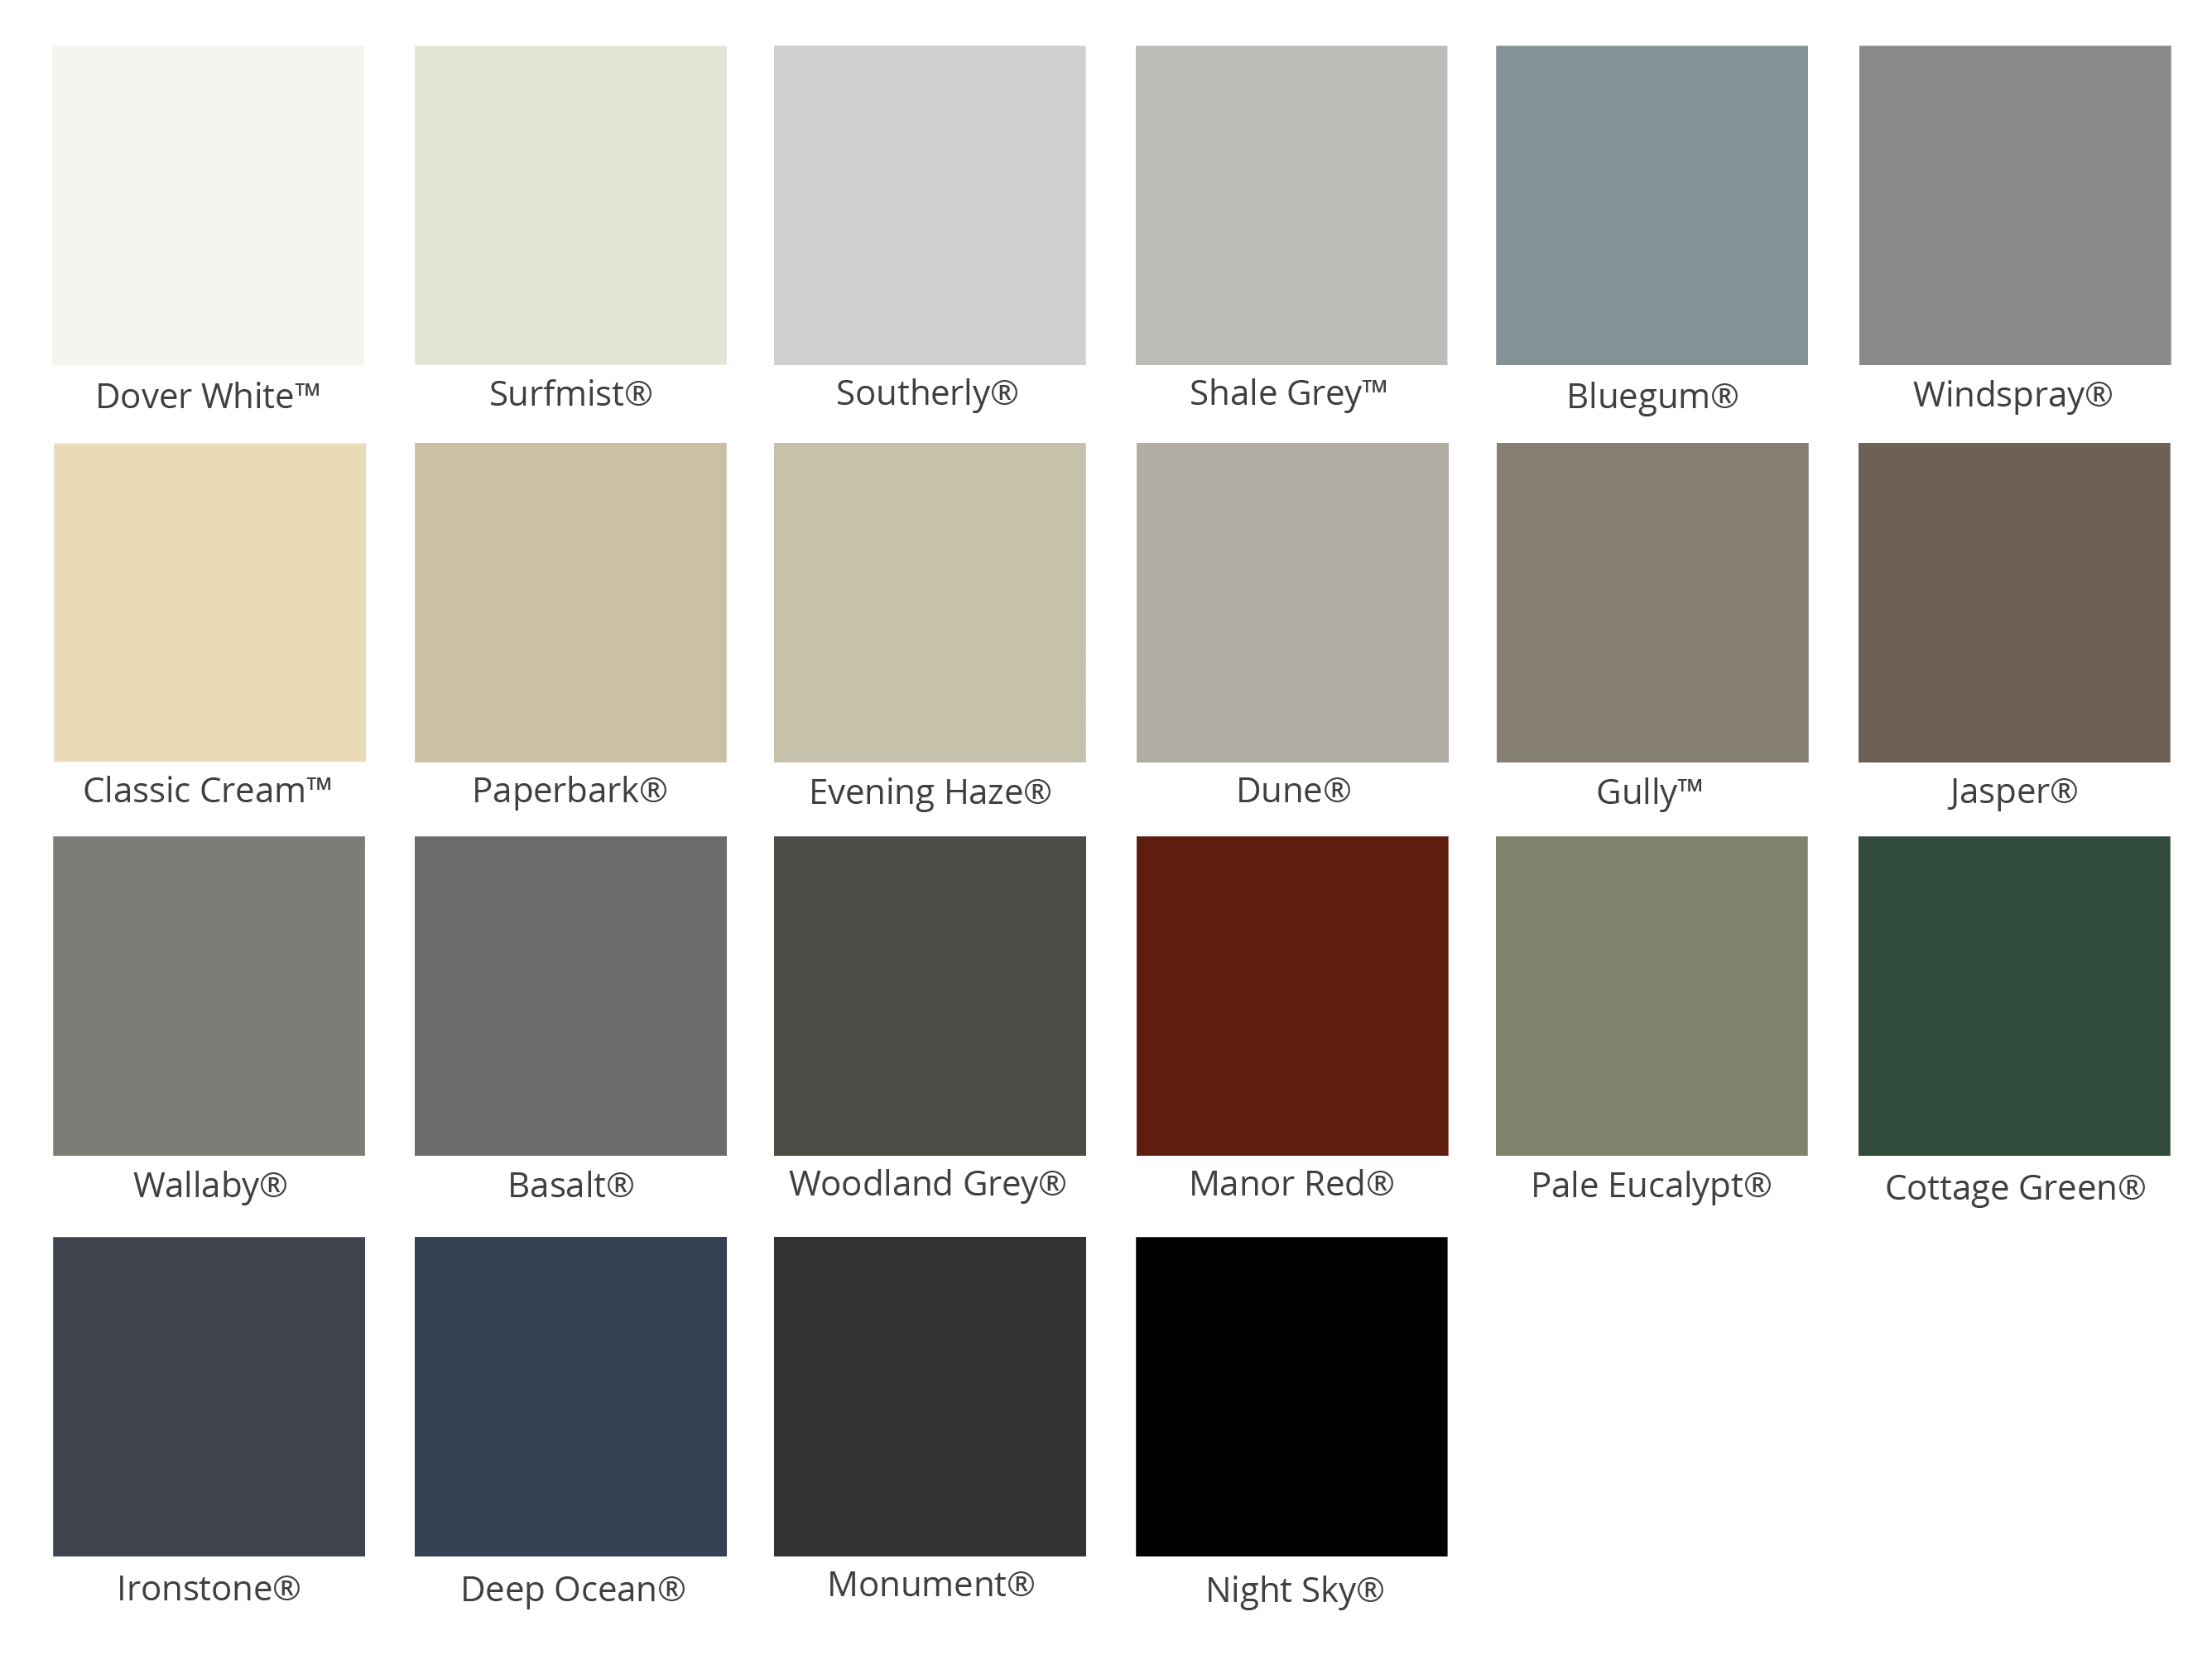
The Colorbond® steel colour swatches above have been reproduced to represent actual product colours as accurately as possible. However, we recommend checking your chosen colour against an actual sample of the product before purchasing, as varying light conditions, different screens and limitations of the printing process may affect colour tones.

Concealed Clip

The most important feature of Quiklok 700 is the single piece concealed clip. Its innovative design ensures maximum performance of the roofing, superior spanning and ease of installation. It is suitable for a variety of industrial and commercial uses, and can be used where a low roof pitch is required and security is important. Buildings such as shopping centres, hospitals, industrial storage, factories and warehouses lend themselves to this style of roofing for its strong, reliable, no fuss application.

• Specially designed single piece galvanised steel roof clip eliminates the possibility of mechanical failure
• The clip is simply fastened onto the purlin and the roof deck locks straight onto the clip for fast and easy installation
• The secure locking action ensures the deck is water tight and protects against entry
• All fasteners are covered by the deck helping to minimise fixing corrosion
• Specially designed recesses for fastening avoid denting the roof sheet.
• Allows for bracket adjustment to accommodate out of square buildings or installer requirements.

Fastener Selection

12 x 40 T17

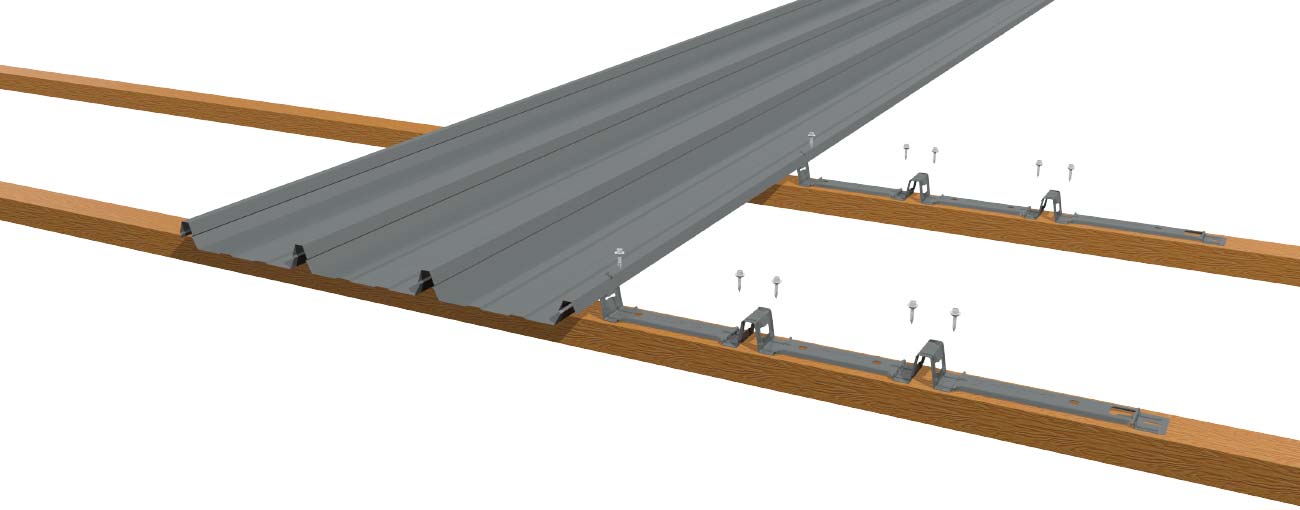
To be used for fixing the conceal clip into timber

12 x 30 SDS

To be used for fixing the conceal clip into steel

Additional Information

Fastener Selection

• Self drilling and tapping screws should NOT use neoprene washers when securing clips to purlins

• The minimum number of screws along the clip is three, one at each end and one centrally. For additional strength, five screws may be used

• The fastener sizes mentioned are suitable for fixing over an insulation blanket up to 55mm thick. For thickness up to 100mm, the next standard screw length to that indicated is to be used

Step 1

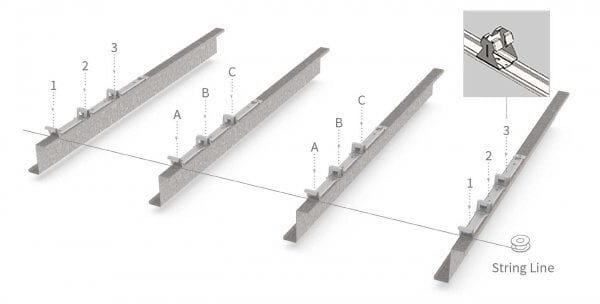
Align the top and bottom clips of the first sheet along the purlins with the arrow pointing in the laying direction, and fasten in positions 1, 2 and 3 (refer to Step 1 below) using the number and type of fasteners specified. Run a string line between the two clips, or use the edge of the first deck to ensure all clips are in line. Mark the top, bottom and middle purlins at one metre from the starting line and at 700mm centres across the purlins. Use these marks to keep the sheets square. Align the remainder of the first run of clips to the string line and along the purlins. Fasten in position A, B and C (refer to Step 1 below) using the number and type of fasteners specified.

Conceal Fix with New Clip in Queensland

Step 2

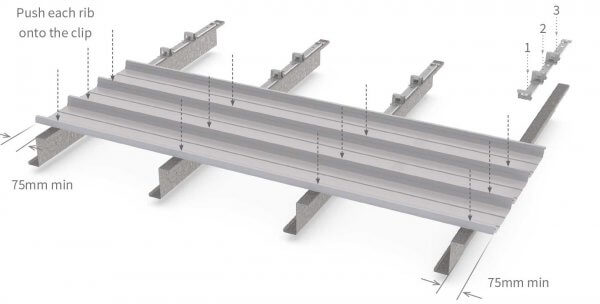
Place the first sheet over the clips ensuring a minimum projection of 75mm at the ridge and into the gutter. Snap each rib onto the clip at every purlin using steady foot pressure, ensuring complete deck engagement at every rib on every clip (see the diagram below). Hook the next run of clips over the last rib of the first sheet. The clips will align themselves and must be butted together for correct positioning. Align the hole with the slot and fasten at the joint first, then work along the bracket. During laying, regularly check the sheets for fanning or creep. If minor adjustment is necessary, the clips can be pulled away from the sheet while fastening.

cladding-roofing-sheeting-walling-conceal-fix-install-2

Step 3

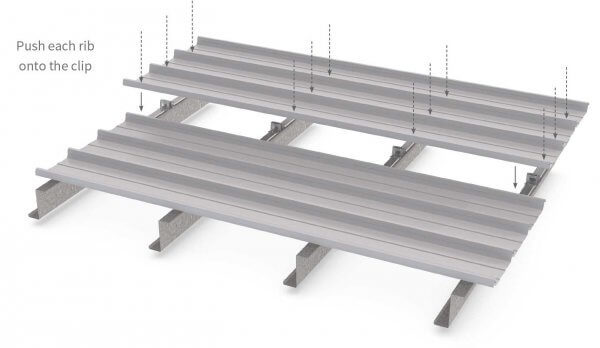
Place the second sheet over the clips, ensure the end of the sheet aligns with the first sheet. Snap the deck onto the clips in the laying order using steady foot pressure and fully engage the interlocking rib onto each clip. It is important to ensure the deck is engaged on each rib, on every clip, and the deck is engaged along its entire length. Install the remaining clips and sheets. Remember to frequently check the coverage to maintain squareness and adjust for creep where necessary. At the end of the purlin, cut the clips and deck where necessary to suit. To secure the final sheet edge, cut the end off the bracket, hook over the last rib and fasten. Finally, remember to turn up the pans at the ridge and down at the gutter end.

cladding-roofing-sheeting-walling-conceal-fix-install-3

Roof Laying Procedure

Prevailing Wind  >                         <  Laying Direction

cladding-roofing-sheeting-walling-conceal-fix-laying

Material Specifications

Material Properties Finish 0.42BMT 0.48BMT
Total Coated Thickness (TCT)mm Zincalume® 0.47 0.53
Total Coated Thickness (TCT)mm Colorbond® 0.5 0.56
Mass (kg/linear metre) Zincalume® 3.26